

A remodel can look simple on paper until the debris starts piling up. Old cabinets, drywall, flooring, tile, plaster, fixtures, lumber, and packaging can fill a garage or driveway much faster than most homeowners expect.
This home renovation dumpster rental Long Island guide explains what to know before you start tearing out materials. You will learn what size dumpster may fit your project, what you can usually load, what to ask about first, when permits may matter, and when it is smarter to rent a dumpster instead of relying on trash bags or repeated dump runs.
Trust Block
Trusted dumpster rental and cleanup guidance that turns confusing renovation debris, dumpster sizes, placement rules, and disposal concerns into clear next steps. Focused on helping homeowners, renters, landlords, contractors, and business owners plan safer cleanup projects, avoid common rental mistakes, and understand when it is the right time to rent a dumpster before debris slows the job down.
Quick Answer: Do You Need a Dumpster for a Home Renovation on Long Island?
Yes, many home renovation projects on Long Island need a dumpster because renovation debris often cannot be handled safely with normal household trash. A dumpster is especially useful for kitchen remodels, bathroom renovations, basement updates, flooring removal, roofing work, and multi-room cleanouts.
For small projects, a 10-yard dumpster may be enough. For kitchen, bathroom, or multi-room renovations, a 20-yard dumpster is often the more practical choice. Larger remodels may need a 30-yard dumpster, while heavy debris like concrete, brick, tile, or masonry may require a smaller dedicated container because weight matters as much as volume.
At a Glance: Renovation Dumpster Planning for Long Island Homeowners
Question | Practical Answer |
Best dumpster size for a small remodel | Usually 10 yards |
Best size for a kitchen or bathroom remodel | Often 20 yards |
Best size for a larger renovation | Often 30 yards |
Best option for heavy debris | Smaller dedicated container |
Permit concern | Usually depends on placement |
Easiest placement | Private driveway, when space allows |
Riskier placement | Street, sidewalk, public road, or tight curb area |
Ask before loading | Paint, chemicals, asbestos, appliances, tires, fuel containers, and certain electrical fixtures |
Best time to rent | Before demolition starts |
Biggest mistake | Renting too small or booking too late |
Why Home Renovations Create More Debris Than Most Homeowners Expect
Home renovation debris is bulky, awkward, and often heavier than it looks. One small bathroom can create piles of tile, drywall, vanity parts, old plumbing pieces, trim, packaging, and flooring scraps.
A kitchen remodel can create even more waste. Cabinets, countertops, backsplash tile, old appliances, wallboard, flooring, and wood scraps can quickly overwhelm a garage, driveway, or curb area.
Trash Bags and Curbside Pickup Usually Are Not Enough
Trash bags are not designed for sharp tile, broken drywall, wood scraps, nails, plaster, or heavy flooring. They can tear, leak dust, or become too heavy to move safely.
Curbside pickup also may not accept construction debris from renovation work. Even when small amounts are allowed, it can take several pickups to remove what one dumpster could handle in a single rental period.
A Dumpster Keeps the Work Area Safer and Cleaner
A dumpster gives renovation debris one clear place to go. That helps keep walking paths, driveways, garages, and work areas cleaner during the project.
It also helps reduce trip hazards. Loose boards, broken tile, exposed nails, and scattered drywall can create real safety risks for homeowners, children, pets, contractors, and delivery crews.
What Size Dumpster Do You Need for a Home Renovation?
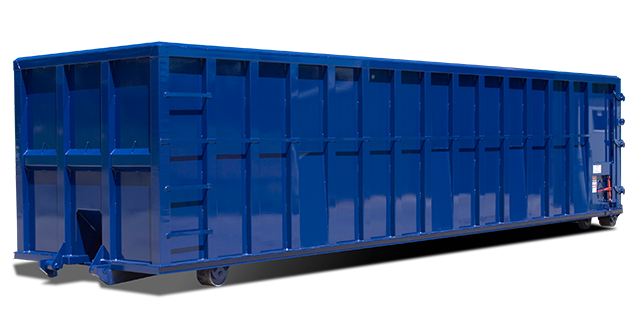
The right dumpster size depends on project scope, debris type, and how much material will be removed. Do not choose only by room size.
A small room with tile, plaster, and old fixtures may weigh more than a larger room with lighter debris. That is why it helps to think about both volume and weight before booking.
10-Yard Dumpster for Small Renovation Debris
A 10-yard dumpster is often a good fit for smaller projects. This may include a small bathroom remodel, closet renovation, laundry room update, minor flooring removal, or a small amount of drywall and trim.
It is also useful when driveway space is limited. For heavy debris, a smaller dumpster may be safer because concrete, brick, tile, and masonry can hit weight limits quickly.
20-Yard Dumpster for Kitchen, Bathroom, and Multi-Room Projects
A 20-yard dumpster is often the best middle option for homeowners. It gives more room than a small container without feeling oversized for many residential projects.
This size may work well for kitchen renovations, bathroom remodels, basement updates, flooring removal, cabinet removal, and mixed renovation debris. It is also a common choice when you are not sure whether a 10-yard container will be enough.
30-Yard Dumpster for Larger Remodels
A 30-yard dumpster may be better for larger remodeling projects. This can include whole-home updates, major basement renovations, large deck removal, multi-room demolition, or bigger contractor-led projects.
However, bigger is not always better. If the debris is very heavy, a larger dumpster may fill with weight before it fills with volume.
Heavy Debris May Need a Smaller Dedicated Container
Concrete, brick, stone, dirt, tile, and masonry are heavy materials. These materials may need a smaller dedicated dumpster instead of being mixed into a large container with general renovation debris.
Ask about weight limits before loading heavy material. Overweight loads can lead to extra charges, unsafe hauling conditions, or pickup delays.
What Can You Put in a Renovation Dumpster?
Most renovation dumpsters can handle common construction and remodeling debris. However, every provider has rules, and local disposal facilities may have restrictions.
Before loading anything questionable, ask first. A quick question before pickup is better than a rejected load or added handling fee.
Common Renovation Materials Usually Accepted
Common materials may include:
- Drywall
- Wood scraps
- Cabinets
- Doors
- Trim
- Flooring
- Carpet
- Tile
- Plaster
- Countertops
- Sinks and vanities
- Non-hazardous fixtures
- Roofing shingles
- General construction debris
- Packaging from renovation materials
These items should still be loaded carefully. Keep debris below the fill line and avoid letting sharp materials stick out over the top or sides.
Items You Should Ask About Before Loading
Some items may be accepted only with special handling or may need a separate disposal method. Ask before loading:
- Appliances
- Mattresses
- Electronics
- Large metal items
- Old light fixtures
- Fluorescent bulbs
- Ballasts
- Paint cans
- Treated wood
- Large amounts of roofing material
- Large amounts of tile, brick, or concrete
This is especially important during older home renovations. Some materials may look ordinary but require special handling.
Materials That Usually Cannot Go in a Standard Dumpster
Many standard renovation dumpsters do not allow hazardous or restricted materials. These may include:
- Asbestos
- Wet paint
- Chemicals
- Solvents
- Motor oil
- Fuel
- Propane tanks
- Batteries
- Tires
- Refrigerators with refrigerants
- Fuel tanks
- Medical waste
- Contaminated soil
- Containers with leftover liquid or residue
New York State disposal guidance treats some remodeling-related materials differently from normal construction and demolition debris, including friable asbestos-containing waste, garbage, certain hazardous electrical fixtures, tires, fuel tanks, and appliances.
Asbestos is a separate concern in older homes. NYSDEC explains that asbestos-containing materials may include roofing shingles, floor and ceiling tiles, plaster, wallboard, and insulation, and disposal requirements depend on the type and condition of the material.
Do Long Island Homeowners Need a Dumpster Permit?
A dumpster permit may depend on where the dumpster is placed. Private driveway placement is usually simpler than placing a dumpster on a street, sidewalk, public road, or other right-of-way.
Because Long Island includes many towns, villages, county roads, and local rules, homeowners should check placement requirements before delivery. This is especially important in tighter neighborhoods or where driveway space is limited.
Driveway Placement Is Usually Simpler
If the dumpster fits fully on your private driveway, the process is often easier. You still need enough room for delivery, pickup, and safe access around the container.
Before delivery, move cars, low branches, toys, basketball hoops, planters, and anything else that may block the truck. Also check for low wires or narrow turns.
Street or County Road Placement May Require Approval
Street placement can be more complicated. If the dumpster sits on a county road, public street, sidewalk, or right-of-way, approval may be required.
Nassau County’s official permit guidance tells users to contact DPW regarding dumpsters placed on County roads.
Nassau County and Suffolk County Rules Can Vary by Location
Do not assume one Long Island rule applies everywhere. Nassau County, Suffolk County, towns, villages, and local highway departments may handle placement differently.
For example, Brookhaven’s permit page lists highway work permits related to work in the Town right-of-way, including residential highway work permits. Hempstead’s Highway Department also lists right-of-way permit forms for residents.
If you are unsure, ask your dumpster provider what they usually see in your area and check with the local municipality when the dumpster cannot stay fully on private property.
What Affects Home Renovation Dumpster Rental Cost on Long Island?
Dumpster rental cost on Long Island can vary because every renovation is different. The biggest factors are size, debris weight, rental period, location, disposal rules, and whether the load includes special materials.
Competitor pricing examples often show a wide range rather than one fixed price. One Long Island guide notes that many standard rentals may run between $300 and $800 for a seven-day period, depending on size, location, and debris type.
Dumpster Size
Larger dumpsters usually cost more than smaller dumpsters. However, renting too small can also cost more if you need a second container or emergency swap-out.
The goal is not to choose the cheapest dumpster. The goal is to choose the right size for the amount and type of debris.
Debris Weight and Material Type
Weight can affect pricing and pickup. Heavy materials like tile, brick, concrete, plaster, roofing shingles, and masonry can push a container toward its weight limit quickly.
Mixed renovation debris may be easier to estimate than dense debris. If your project involves heavy tear-out work, mention that before booking.
Rental Period and Pickup Timing
Most homeowners do not want a dumpster sitting longer than needed. At the same time, scheduling pickup too early can create stress if the project runs behind.
Plan your rental window around demolition, contractor schedules, delivery access, and cleanup time. If your project timeline is uncertain, ask how extra days or swap-outs work.
Placement, Access, and Local Disposal Fees
Placement can affect the rental process. Tight driveways, narrow roads, blocked access, soft ground, low wires, or street placement can create added planning needs.
Disposal fees may also vary based on debris type and facility rules. Clear information upfront helps avoid surprise charges.
When Is the Right Time to Rent a Dumpster?
The right time to rent a dumpster is before debris starts taking over the project. Waiting until the garage, yard, or driveway is already full can slow the renovation and make cleanup harder.
A dumpster is not only for major construction. It can also make sense for smaller projects when debris is bulky, sharp, dusty, or difficult to move safely.
Before Demolition Starts
The best time to rent is usually before demolition begins. This gives contractors or DIY homeowners a clear place to put debris from the first day.
It also prevents the common problem of stacking debris in piles and moving it twice.
Before Contractors Arrive
If contractors are handling the renovation, ask who is responsible for debris removal. Some contractors include cleanup, while others expect the homeowner to arrange disposal.
Having the dumpster ready can keep the job moving. It also keeps the work area cleaner for electricians, plumbers, carpenters, flooring crews, painters, and installers.
Before Debris Blocks the Driveway, Yard, or Work Area
If debris blocks access, the project becomes harder. Crews need space for tools, materials, parking, and movement.
Renting early can help prevent delays, damaged landscaping, and unsafe walking paths.
How the Dumpster Rental Process Works
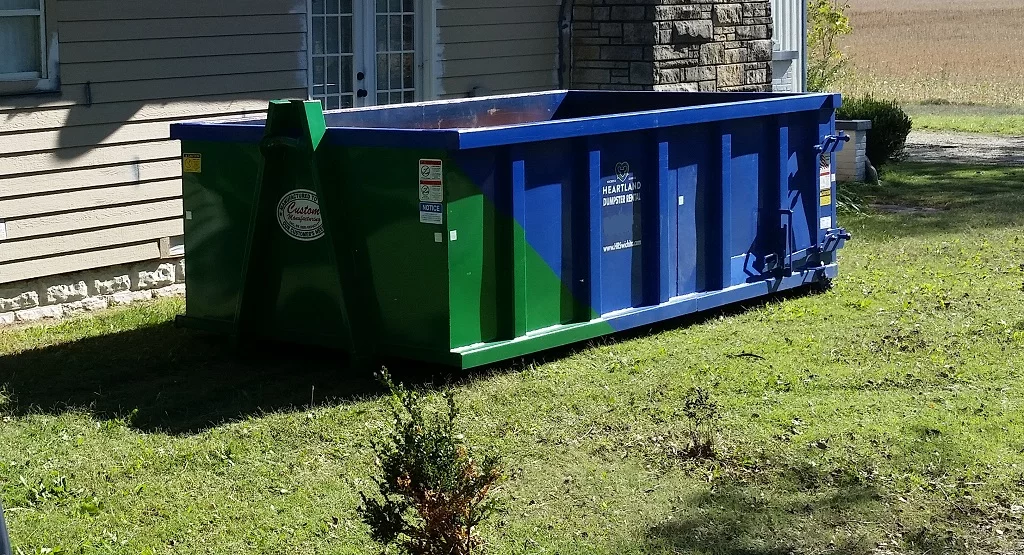
The rental process is simple when planned in the right order. Most problems happen because the size, placement, or debris type was not discussed early enough.
If you are comparing residential dumpster rental options, focus on size guidance, accepted materials, delivery access, rental period, and pickup timing before choosing.
Choose the Right Size
Start by listing the materials you expect to remove. Include cabinets, drywall, tile, flooring, old fixtures, roofing, lumber, doors, trim, and packaging.
Then match the project to a likely size. When in doubt, ask for help instead of guessing.
Schedule Delivery
Choose a delivery date before demolition begins. Make sure the driveway or placement area is clear.
If the dumpster will be placed near a street, sidewalk, curb, or shared access area, confirm rules before delivery.
Load the Dumpster Safely
Load flat and heavy items first when possible. Spread weight evenly instead of piling everything on one side.
Keep debris below the fill line. Do not let boards, pipes, tile, or fixtures stick above the top edge.
Schedule Pickup or Swap-Out
When the dumpster is full or the project is done, schedule pickup. For larger renovations, you may need a swap-out.
A swap-out means the full dumpster is removed and an empty one is delivered so cleanup can continue.
Common Mistakes to Avoid During a Renovation Dumpster Rental
The first mistake is renting too small. A smaller dumpster may look cheaper, but a second haul can cost more than choosing the right size from the start.
The second mistake is ignoring weight. Heavy debris can create overage issues even when the dumpster does not look full.
The third mistake is placing the dumpster where the truck cannot safely access it. Avoid low branches, low wires, blocked driveways, tight turns, soft ground, and parked cars.
The fourth mistake is loading prohibited items. Paint, chemicals, asbestos, appliances, fuel containers, batteries, tires, and certain electrical materials should be discussed before loading.
The fifth mistake is booking too late. During busy renovation seasons, waiting until the last minute may limit size availability or delivery options.